Logs
Logs capture information about events, activities, errors, or status changes; they serve as a valuable resource for troubleshooting, debugging, and monitoring system performance.
Accessing the Logs Tab
-
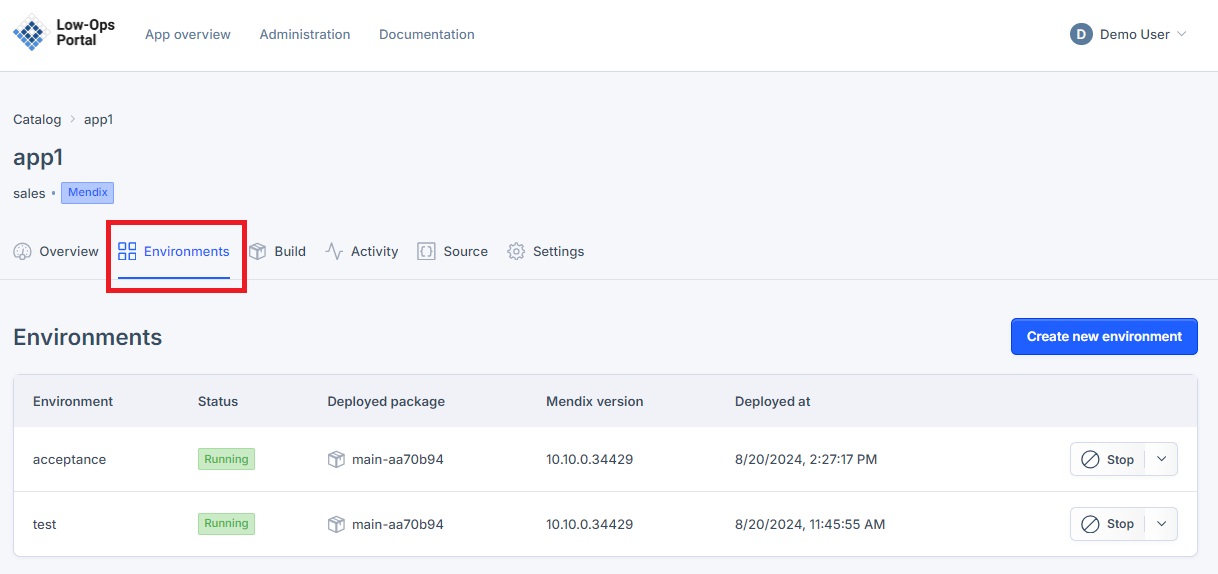
Navigate to the Environments tab.

-
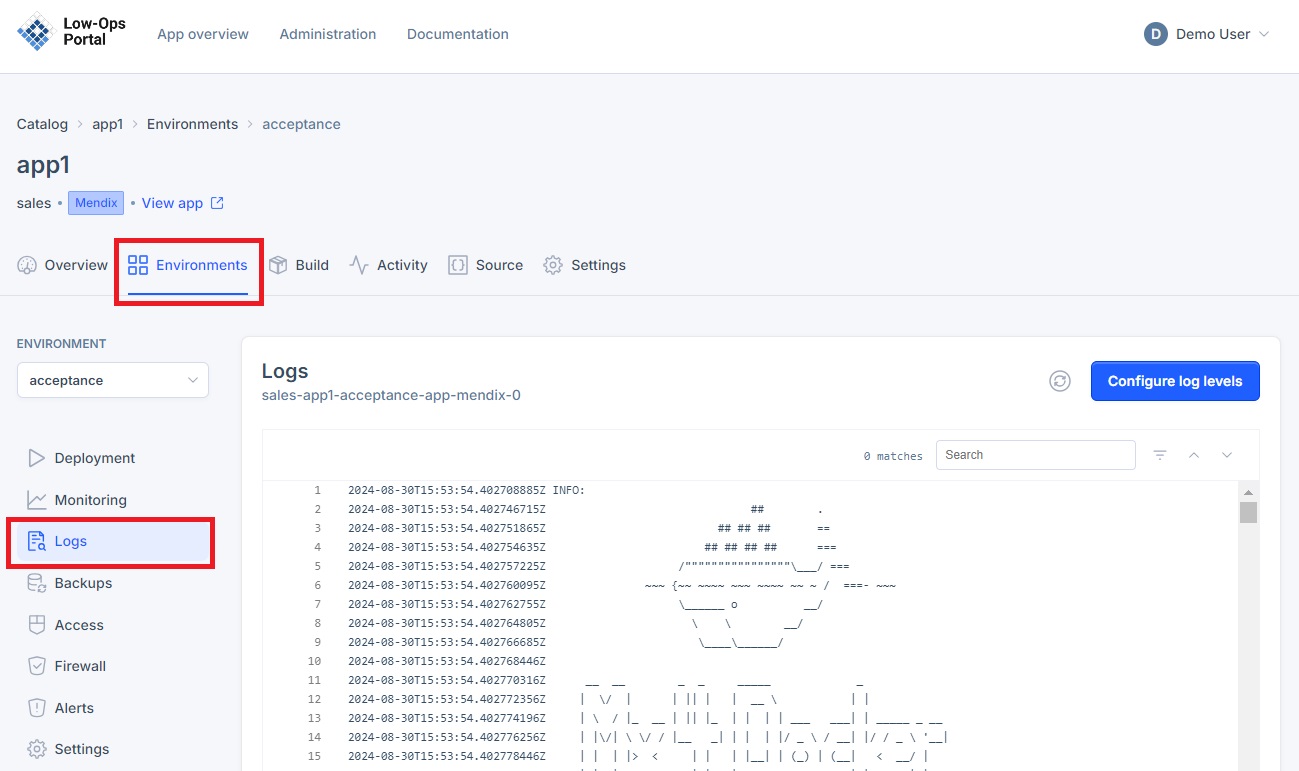
Choose the desired environment from the list.
- A new dropdown navigation menu will appear.
-
In the left-side menu, select Logs.

Configuring Log Levels
-
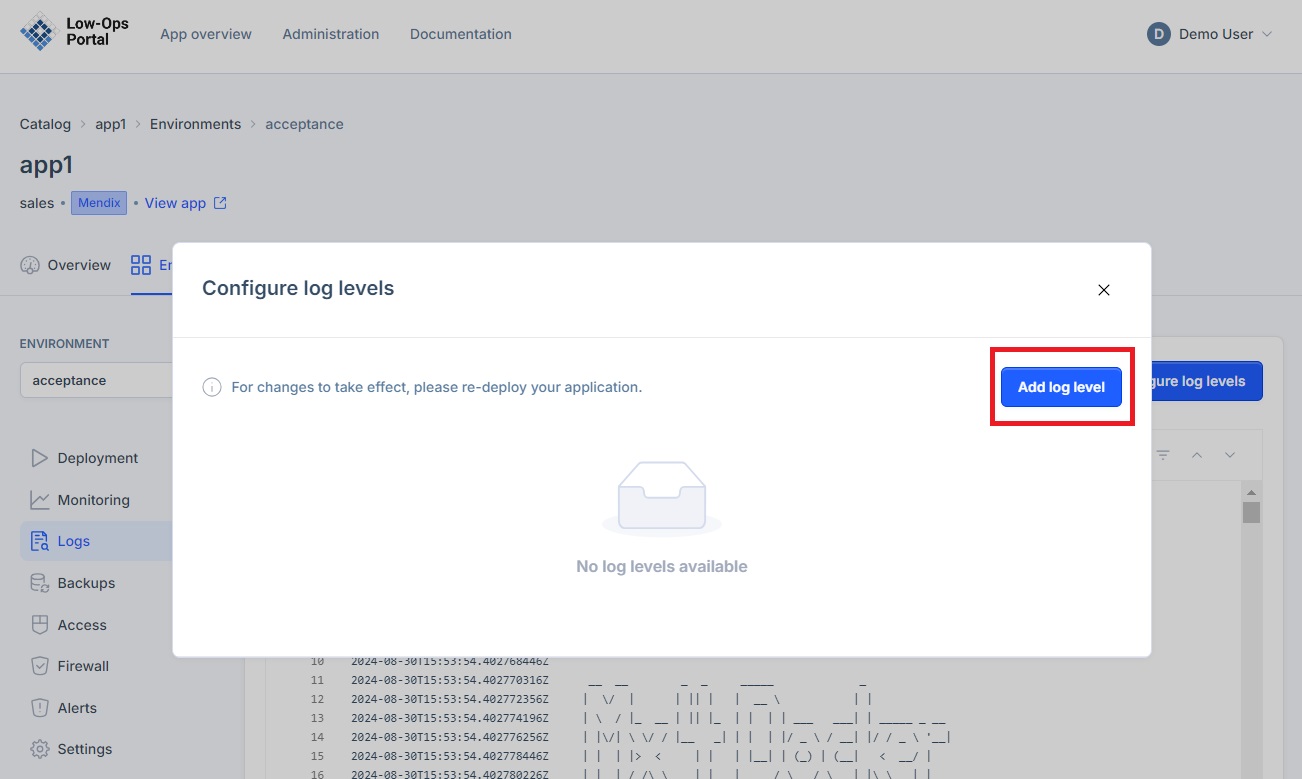
Click the "Configure Log Levels" button in the upper right corner.

-
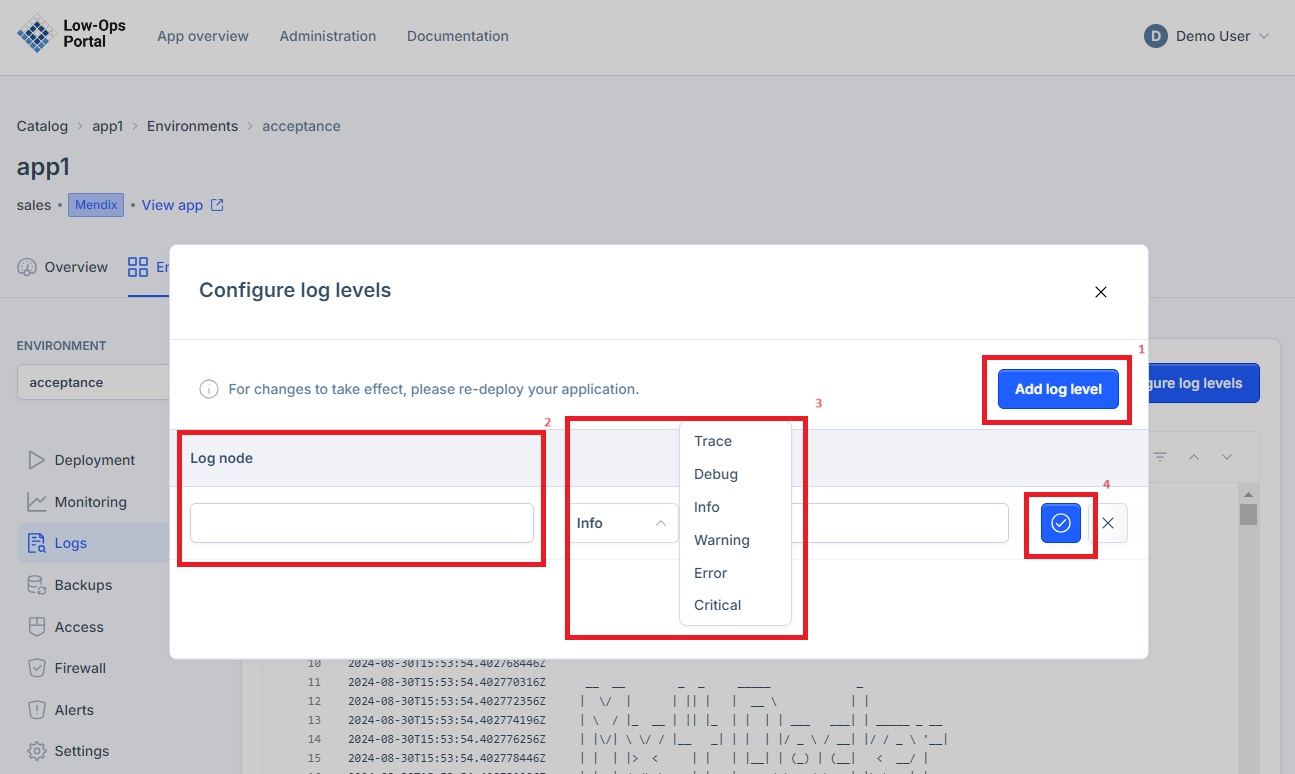
In the pop-up window, click the "Add log level" buton.

-
Specify the Log node.
- Select Log level from the drop-down menu.
- Provide a Description if necessary.
- Click on the blue button to add the log level.
- Return to the Logs tab to review the traces.
NOTE: Re-deploy the application for changes to take effect. Re-deploy the application by following the steps from the Deploy Application Tutorial.