Mendix
This document guides you through creating and deploying new application versions in the Low-Ops platform using Mendix Studio Pro.
Overview
Mendix Studio Pro is a powerful low-code development environment that allows developers to rapidly build and customize enterprise-grade applications. This guide covers the entire process, from accessing the Git repository to making changes in Mendix Studio Pro and verifying them across different environments.
Prerequisites
- Access to the Low-Ops portal
- Mendix Studio Pro installed on your machine
Note: For instructions on logging into the Low-Ops portal, refer to the Login tutorial.
Creating a New Application Version
Access Git Repository
- In the Low-Ops portal, navigate to the "Security" tab.
-
Copy the Git repository URL.

Open Project in Mendix Studio Pro
-
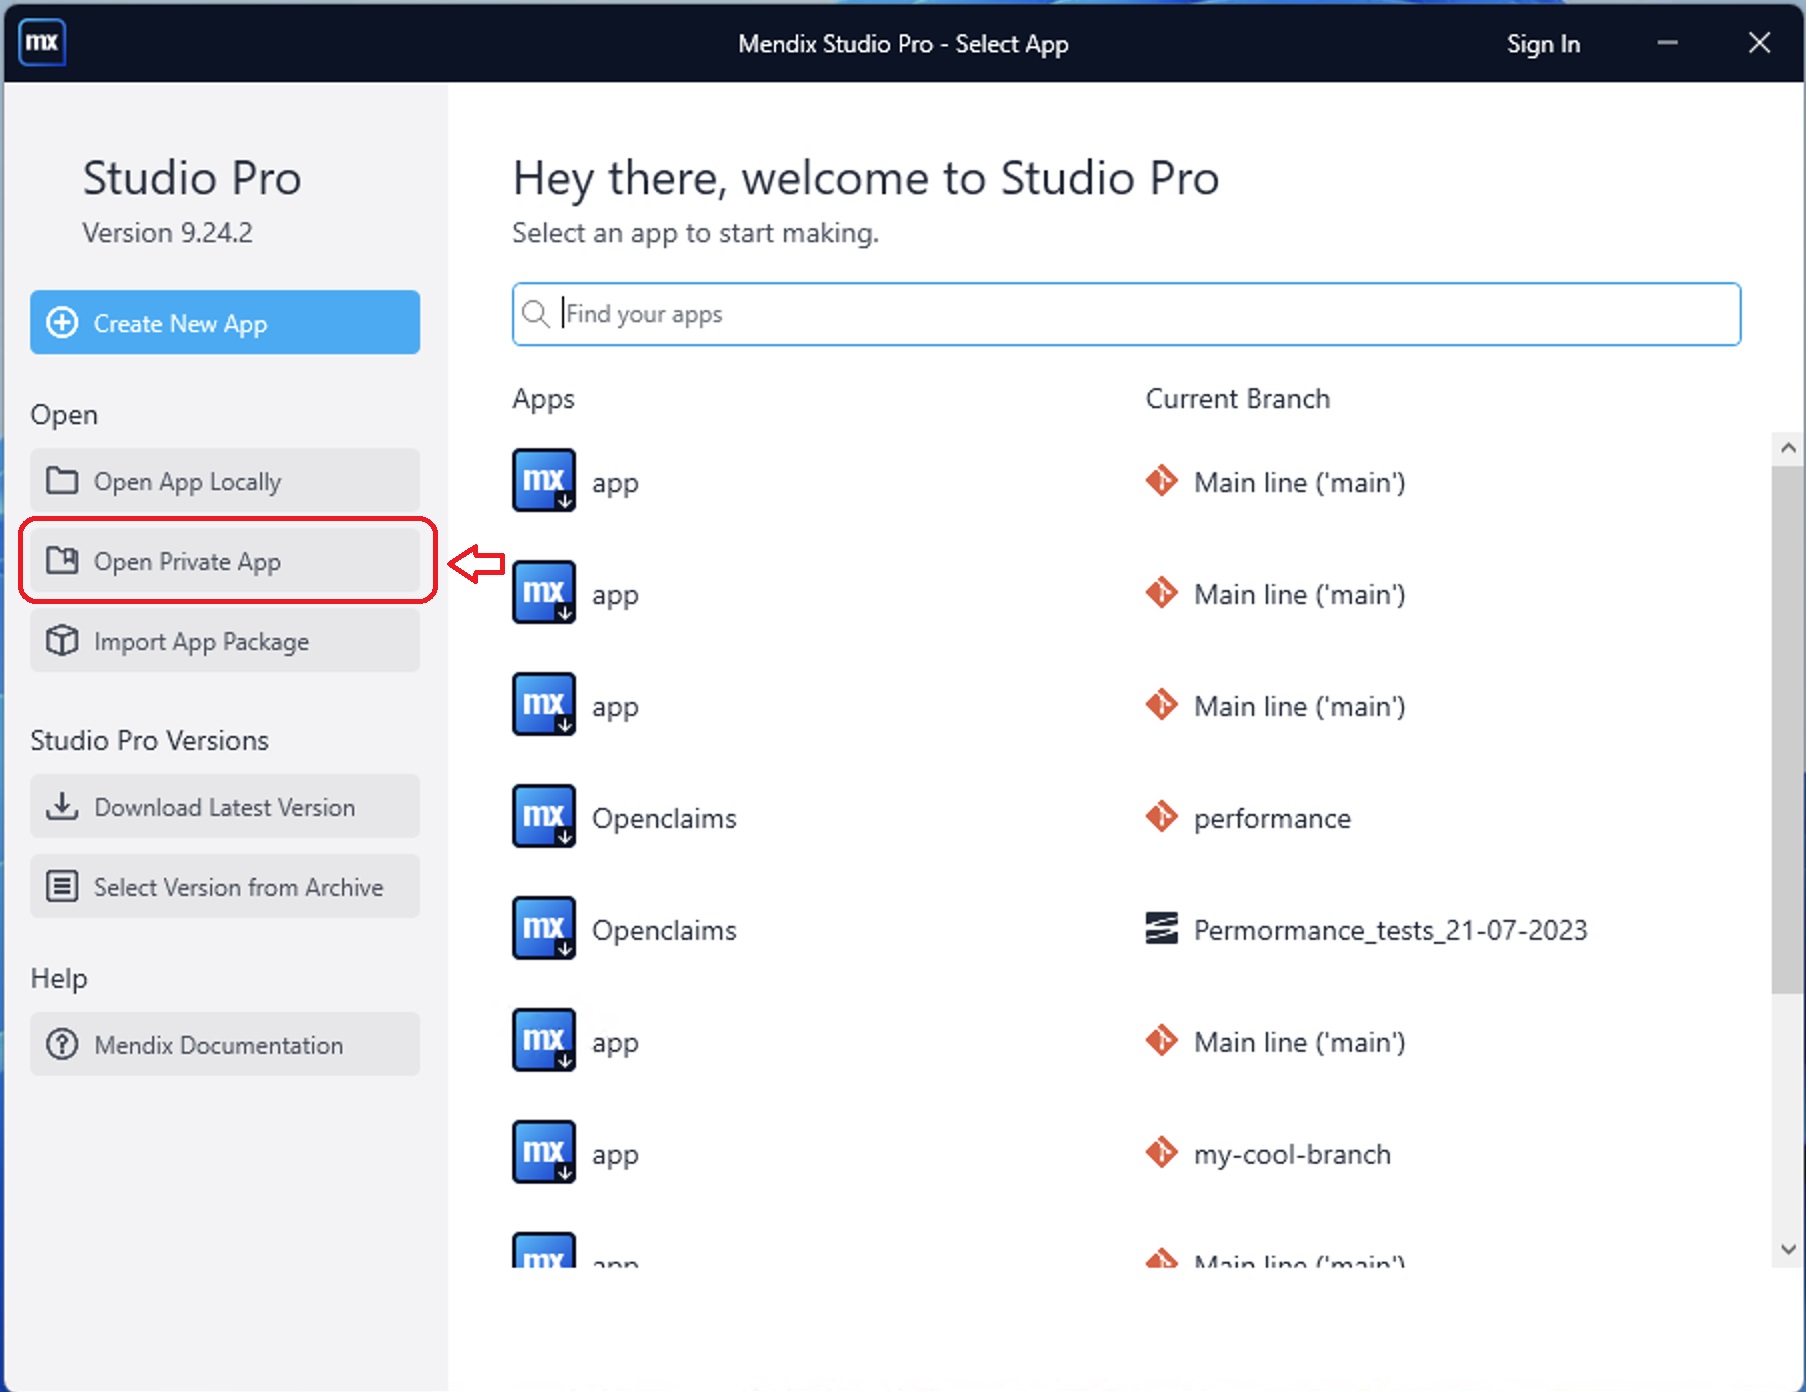
In Mendix Studio Pro, click the "Open Private App" button.
-
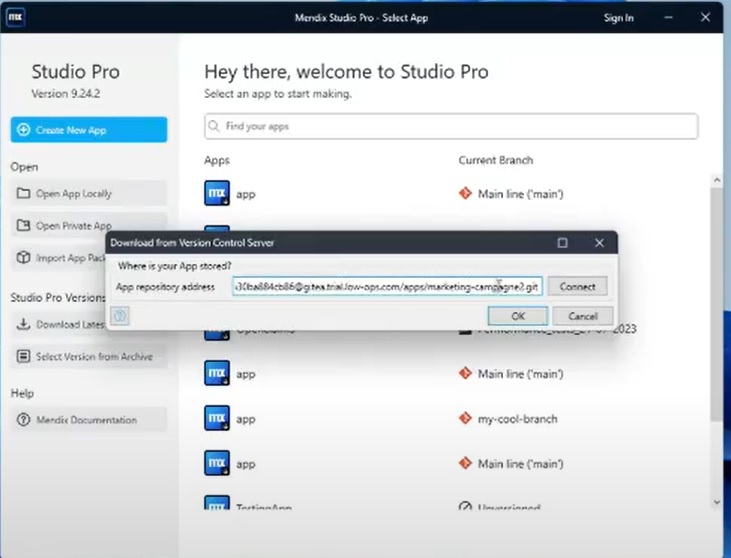
In the pop-up window, paste the Git repository URL.
-
Click "Connect", then "OK".
Make Changes
-
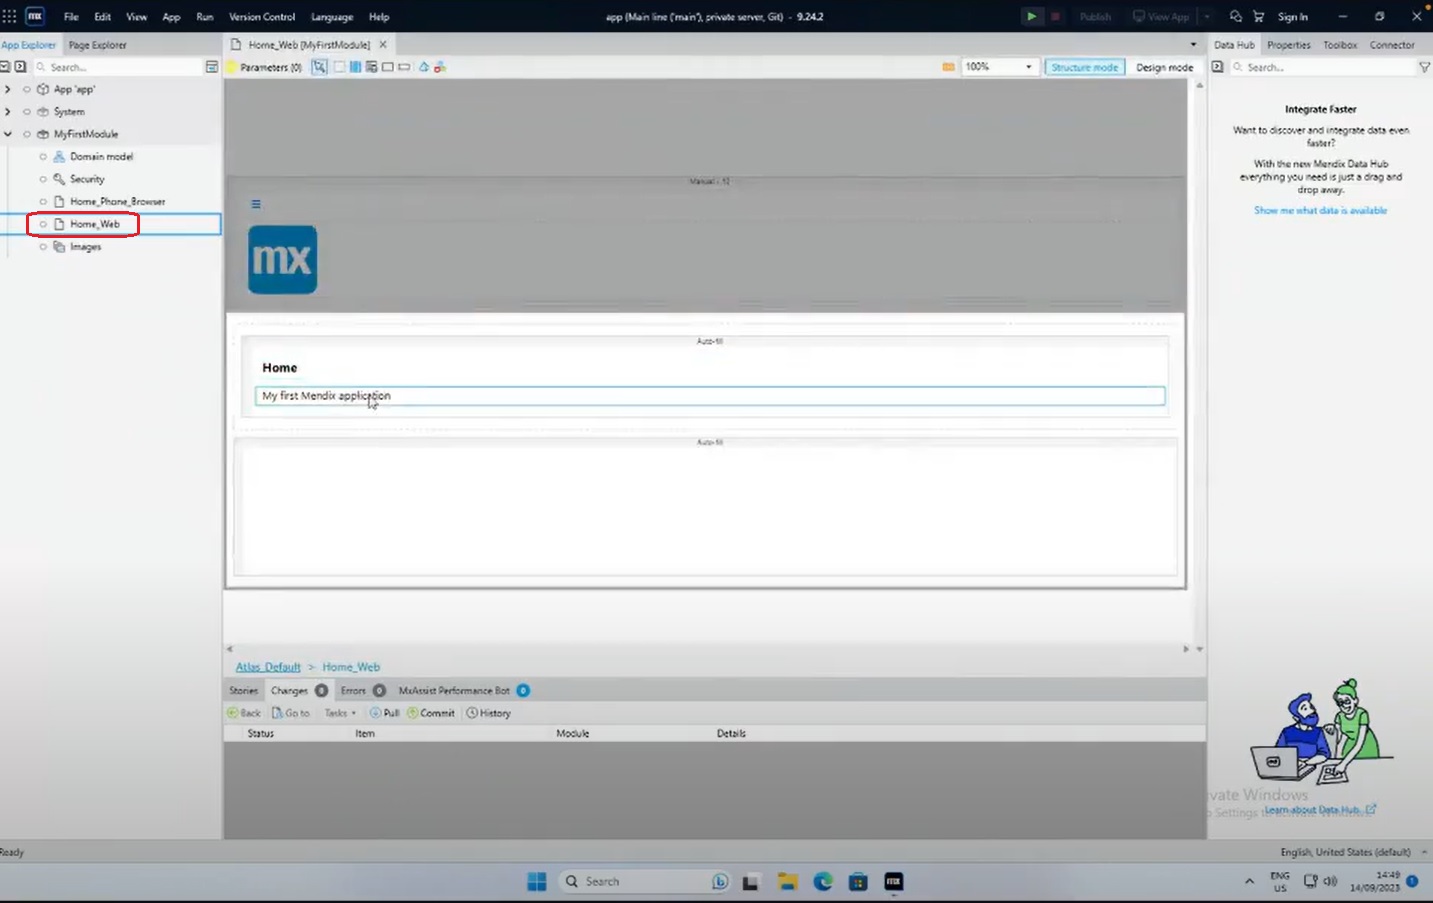
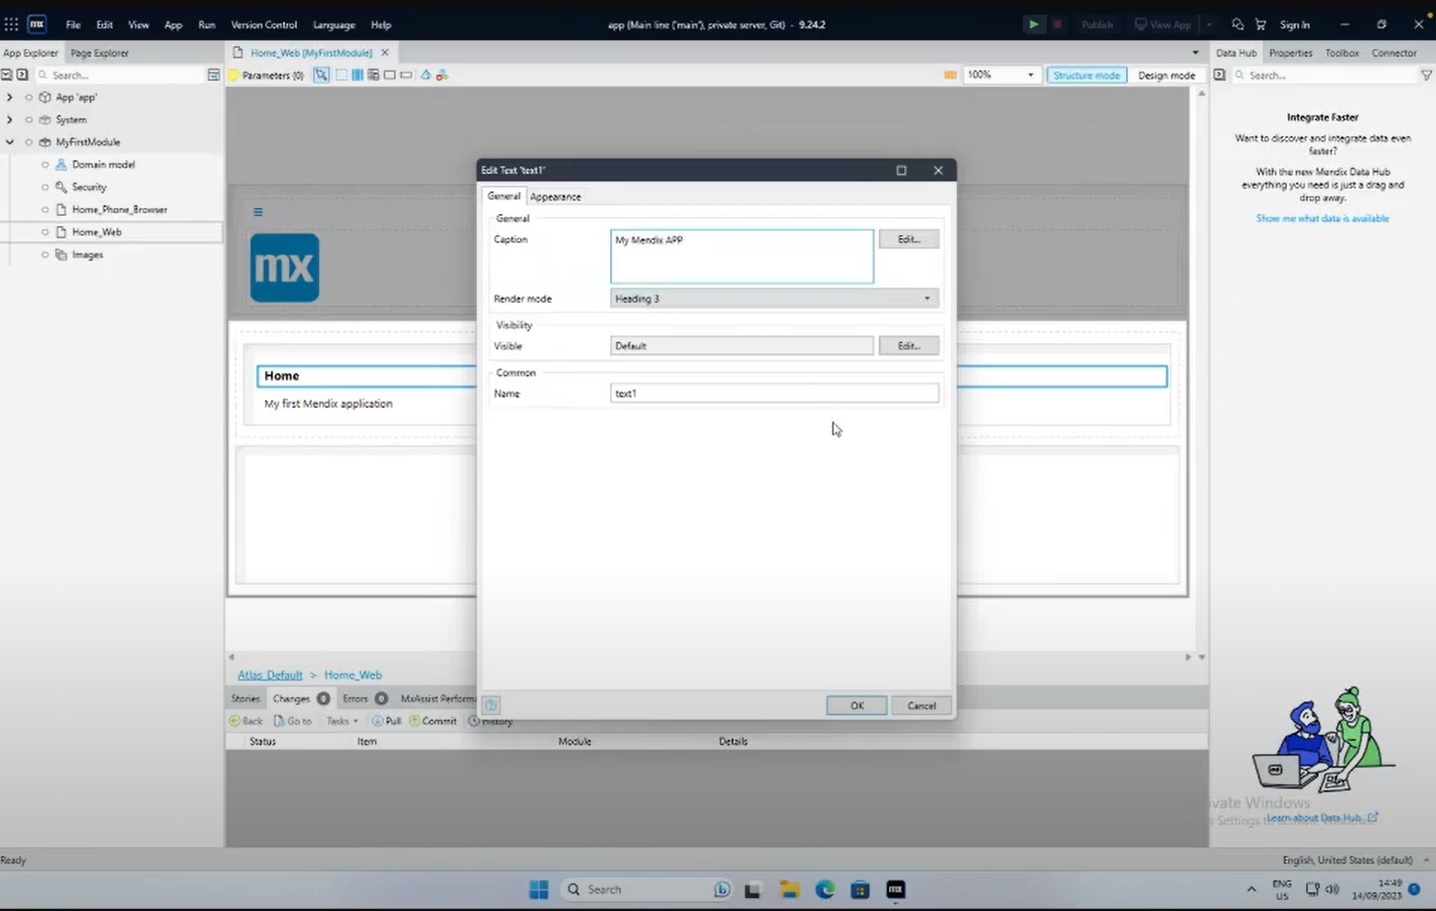
In the "MyFirstModule" menu, select "Home_Web" from the dropdown list.
-
Double-click the item you wish to modify.
-
Make your desired changes and click "OK".
Commit Changes
-
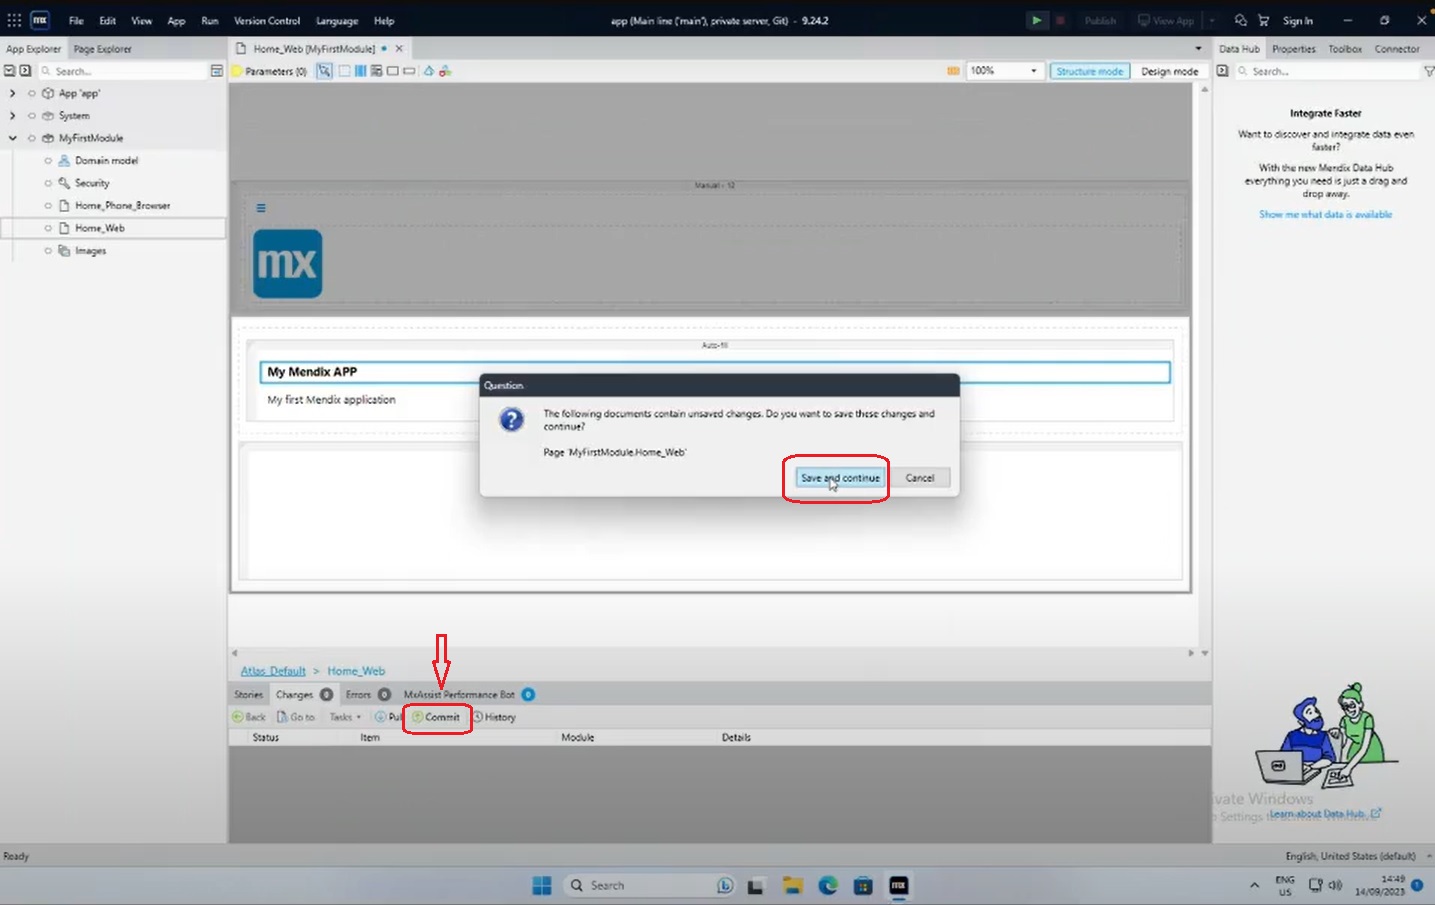
Click the "Commit" button, then "Save and Continue".
-
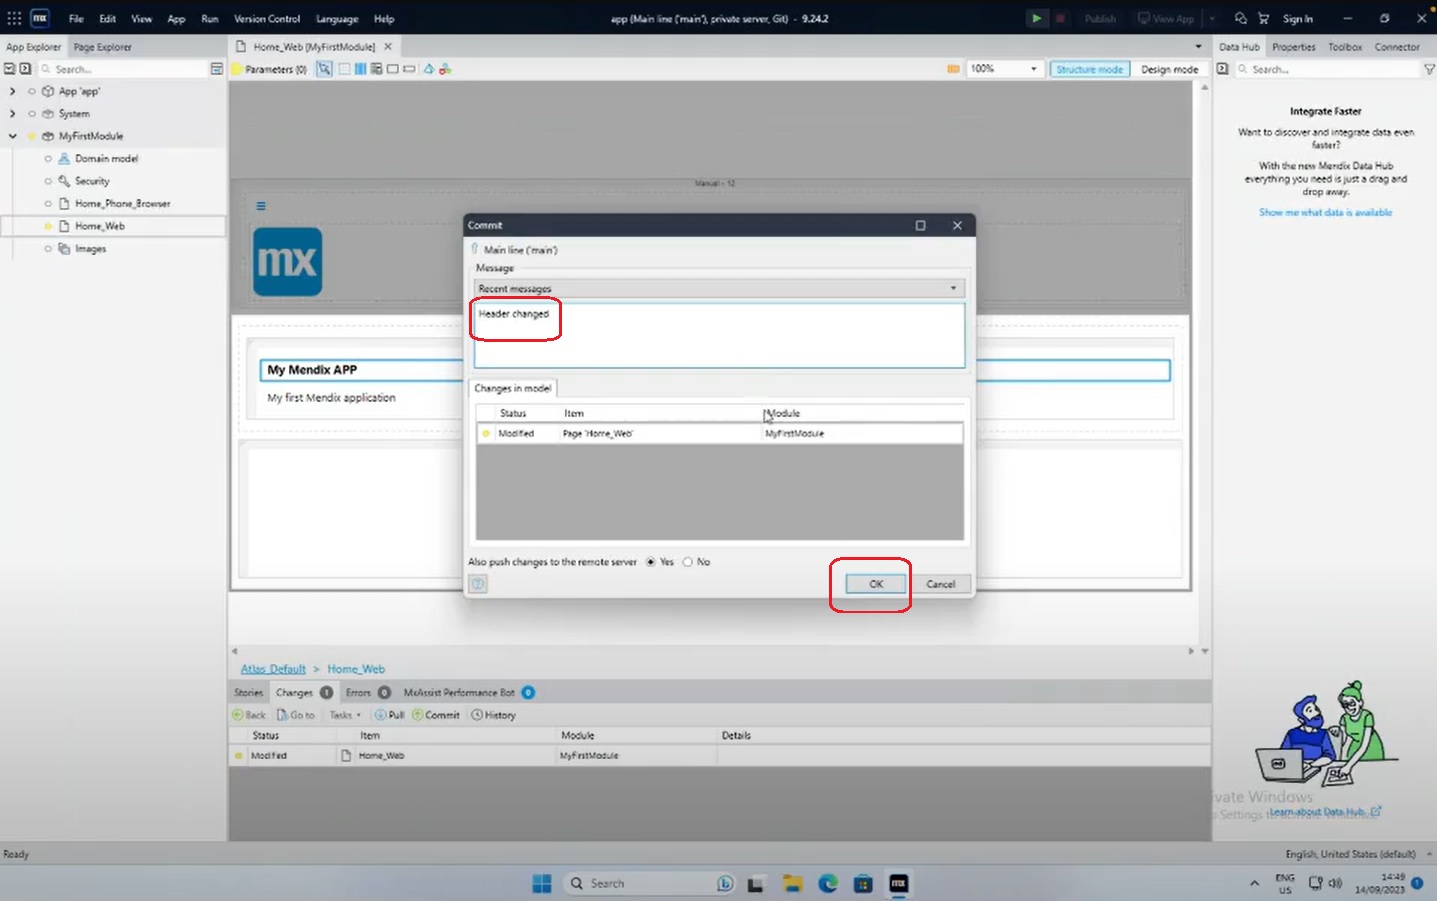
In the pop-up window, describe your changes and click "OK".
Verifying Changes
Check Activity
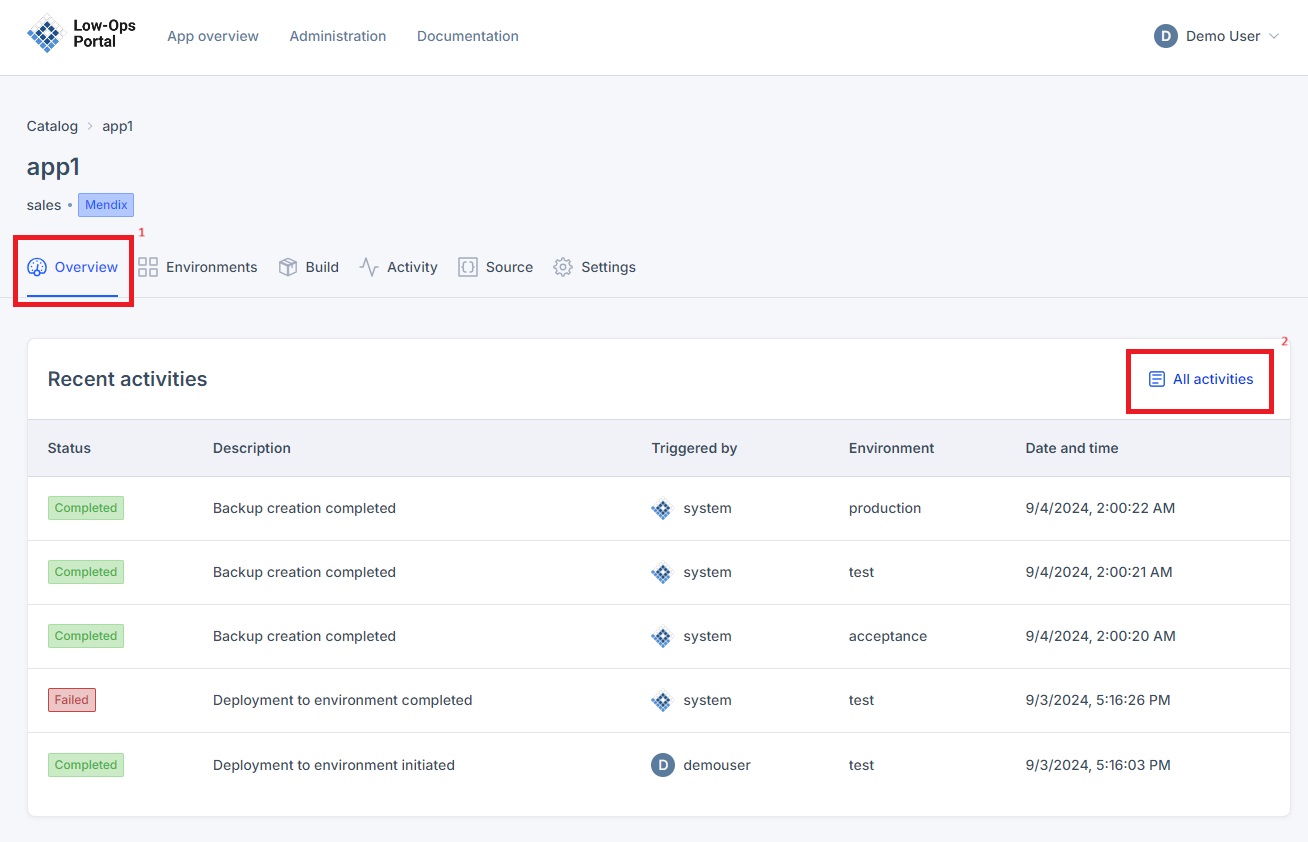
- Navigate to the Activity tab
Note: To learn how to access Activity tab, follow the steps from the Activities tutorial
-
The status of the changes made will be "Completed".
Access Environment
-
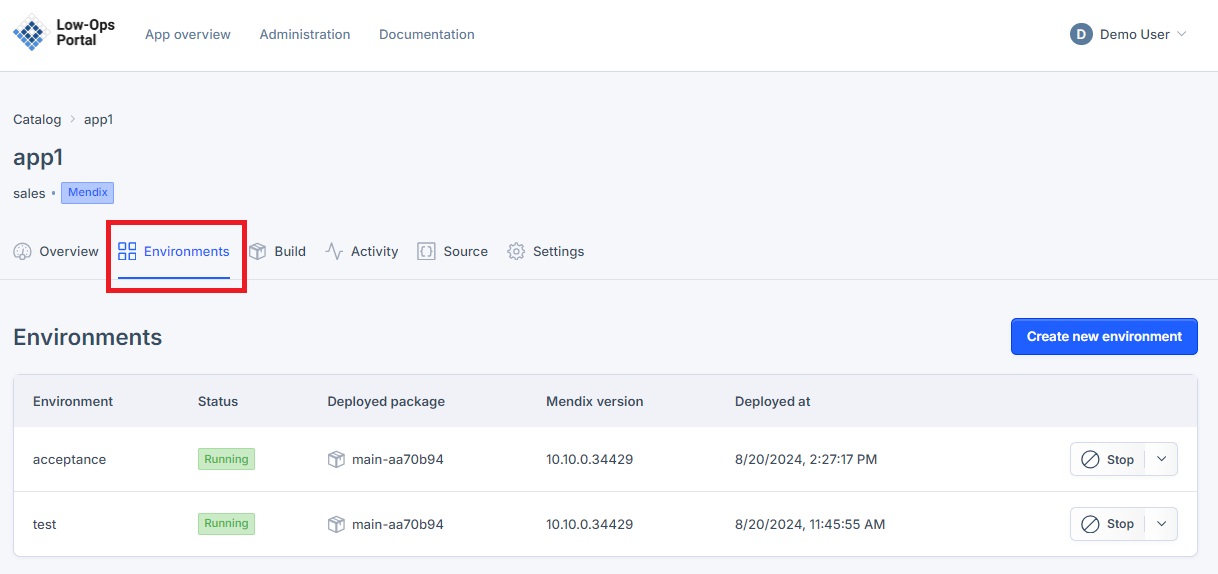
Go to the "Environments" tab and select an environment.
-
In the left-side menu, go to "Access".
Note: To learn how to access "Access" tab, follow the steps from the Access tutorial
<img src="../../assets/images/access.jpg" width="500" alt="Access tab">
Verify Changes in Mendix
- Use the provided URL and login credentials to access Mendix Studio Pro.
-
After logging in, you'll be directed to the Mendix home page where you can observe your implemented changes.
