Azure Single Node Installation
This guide describes how to install the Low-Ops on a single Azure Virtual Machine.
This setup is suitable for testing and development environments. For production use, we recommend using a multi-node setup with proper high availability.
- Azure Portal access with permissions to create Virtual Machines and Network Security Groups
- Available domain name with DNS management access
- Ubuntu 22.04 LTS
- RAM: 16 GB
- CPU: 8 vCPUs
- Disk: 500 GB
Configure Foundation
Step 1. Create Azure Virtual Machine
Log in to Azure Portal. Navigate to Virtual Machines. Click Create and select Azure virtual machine.

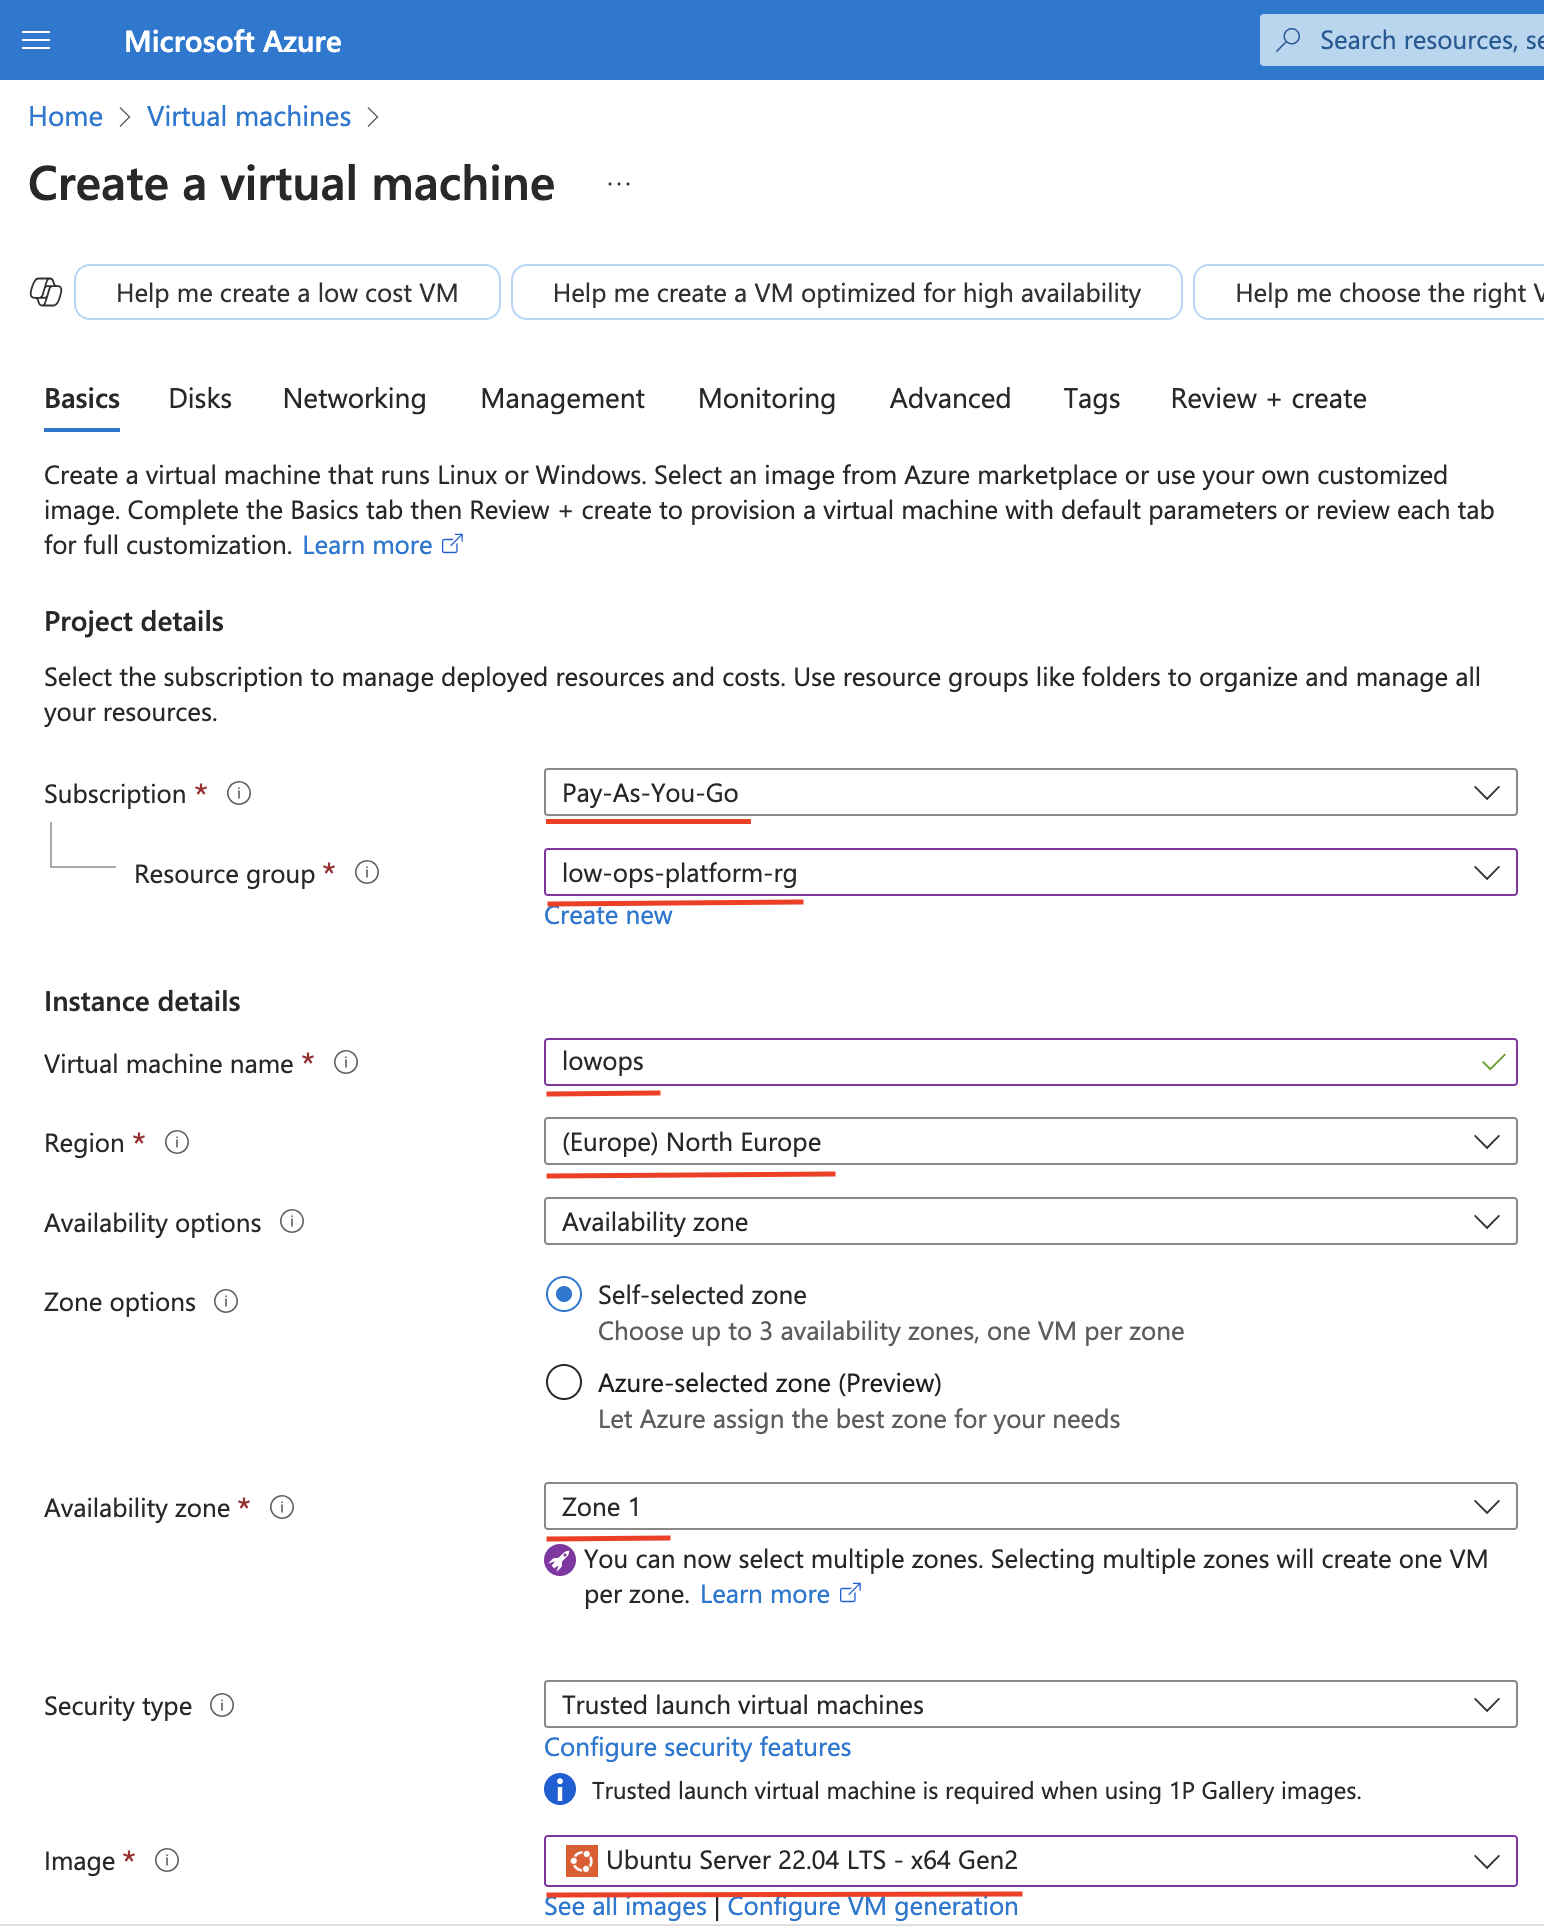
Step 2. Configure basic settings
Subscription: Select your subscription
Resource group: Create new or select existing
Virtual machine name: Enter a name
Region: Select your preferred region
Image: Ubuntu Server 22.04 LTS
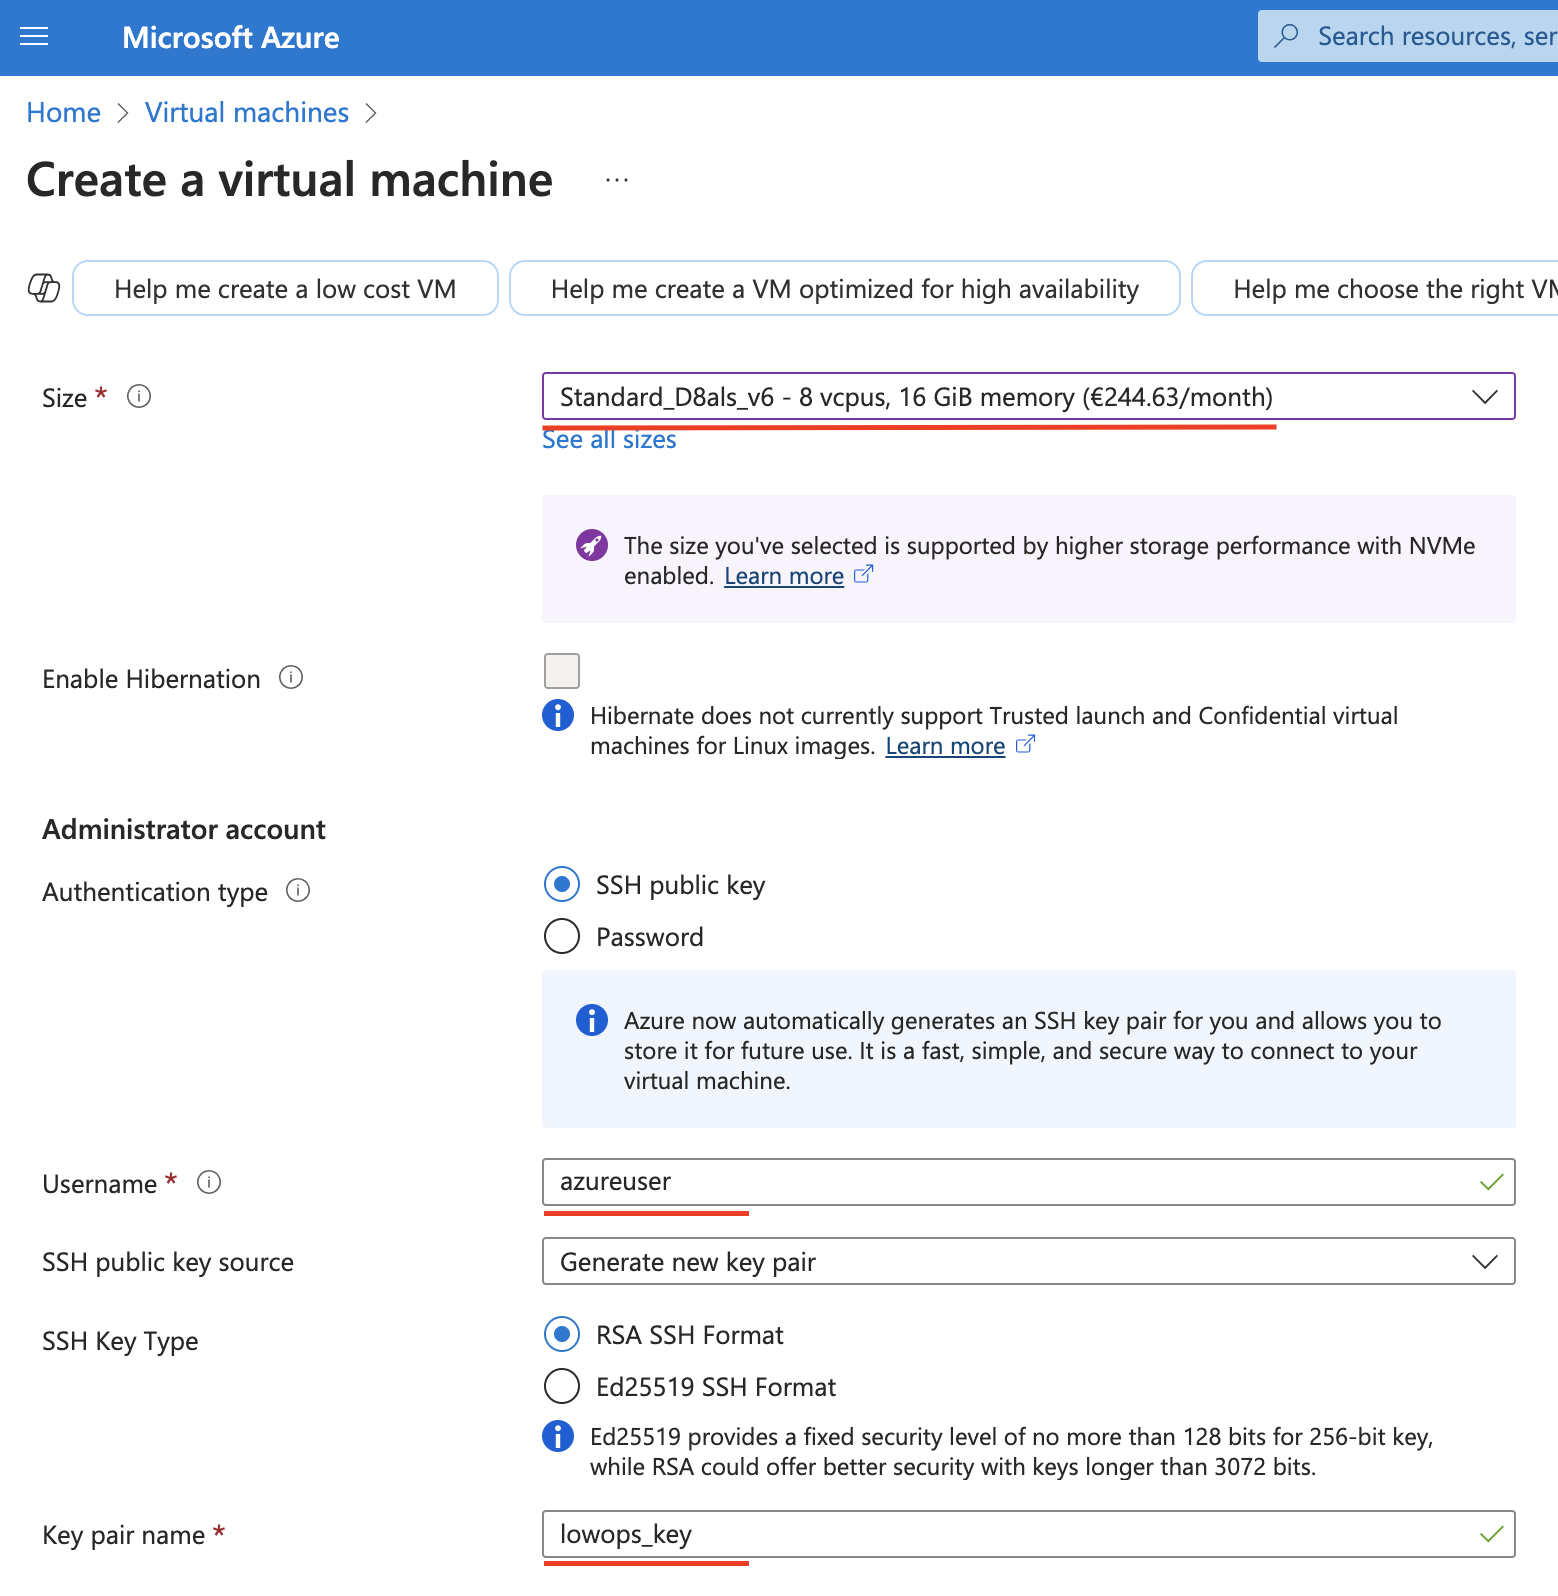
Size: Select a VM size with minimum 8 vCPUs and 16GB RAM (e.g., Standard_D8s_v3)
Step 3. Configure Administrator account
Authentication type: SSH public key
Username: azureuser
SSH public key source: Generate new key pair or use existing
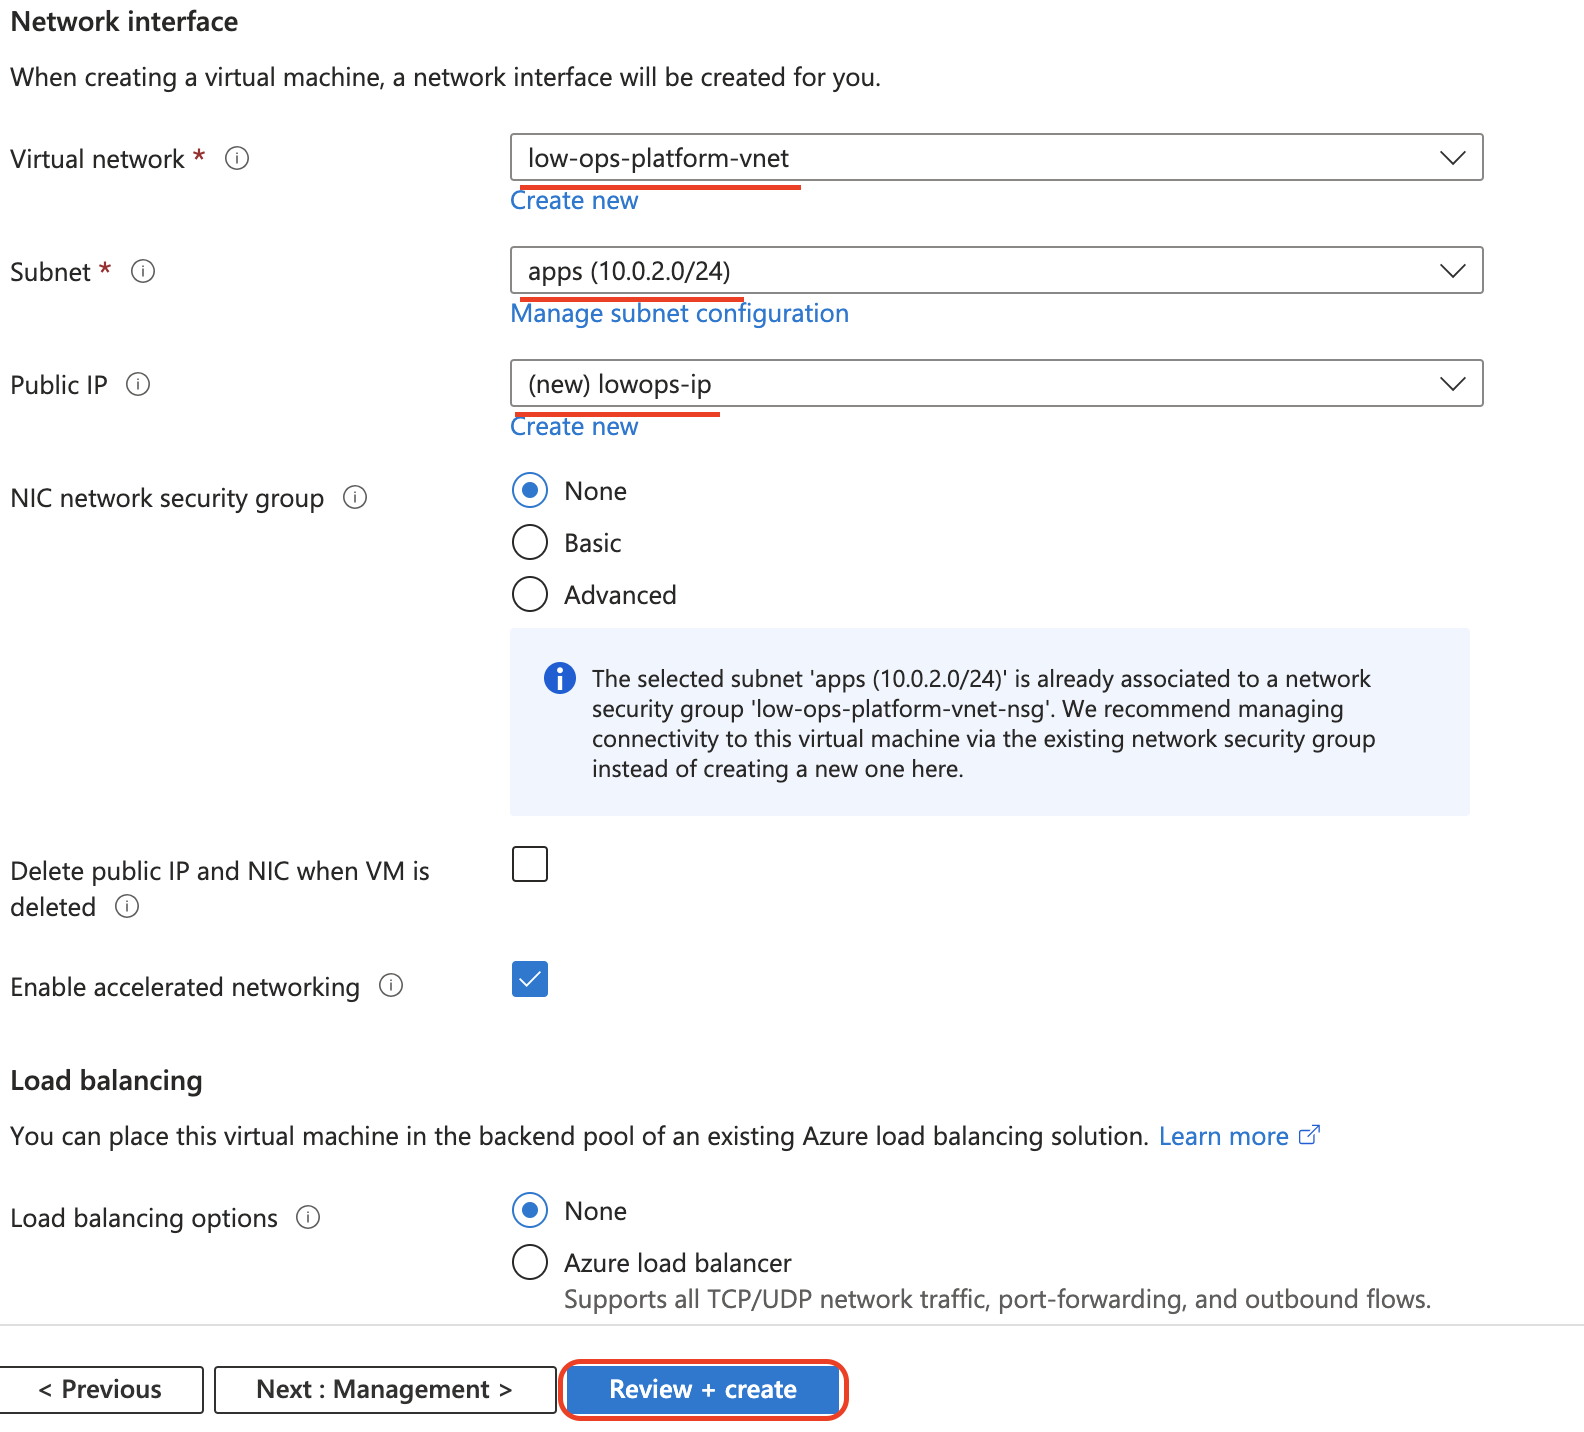
Step 4. Configure Networking
Virtual network: Create new or select existing
Subnet: Create new or select existing
Public IP: Yes
NIC network security group: Advanced
Inbound rules
• SSH (22) from your IP
• HTTP (80) from anywhere
• HTTPS (443) from anywhere
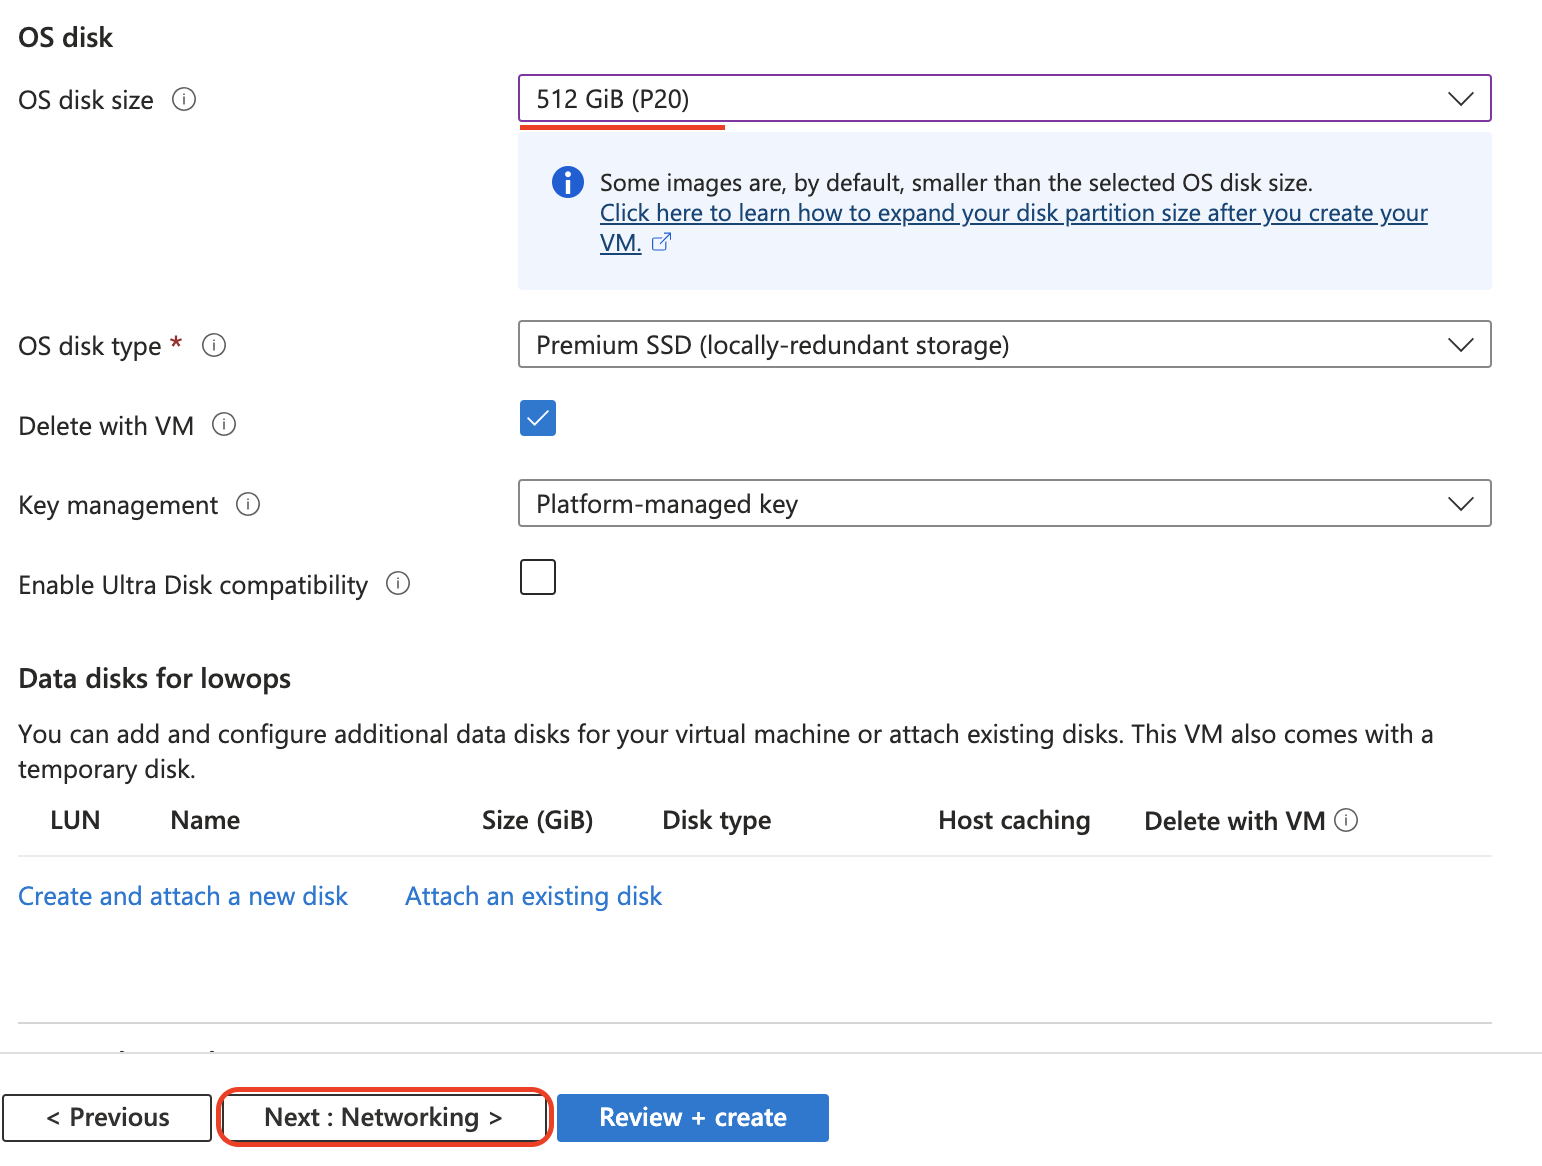
Step 5. Configure Storage
OS disk type: Premium SSD
OS disk size: 500 GB
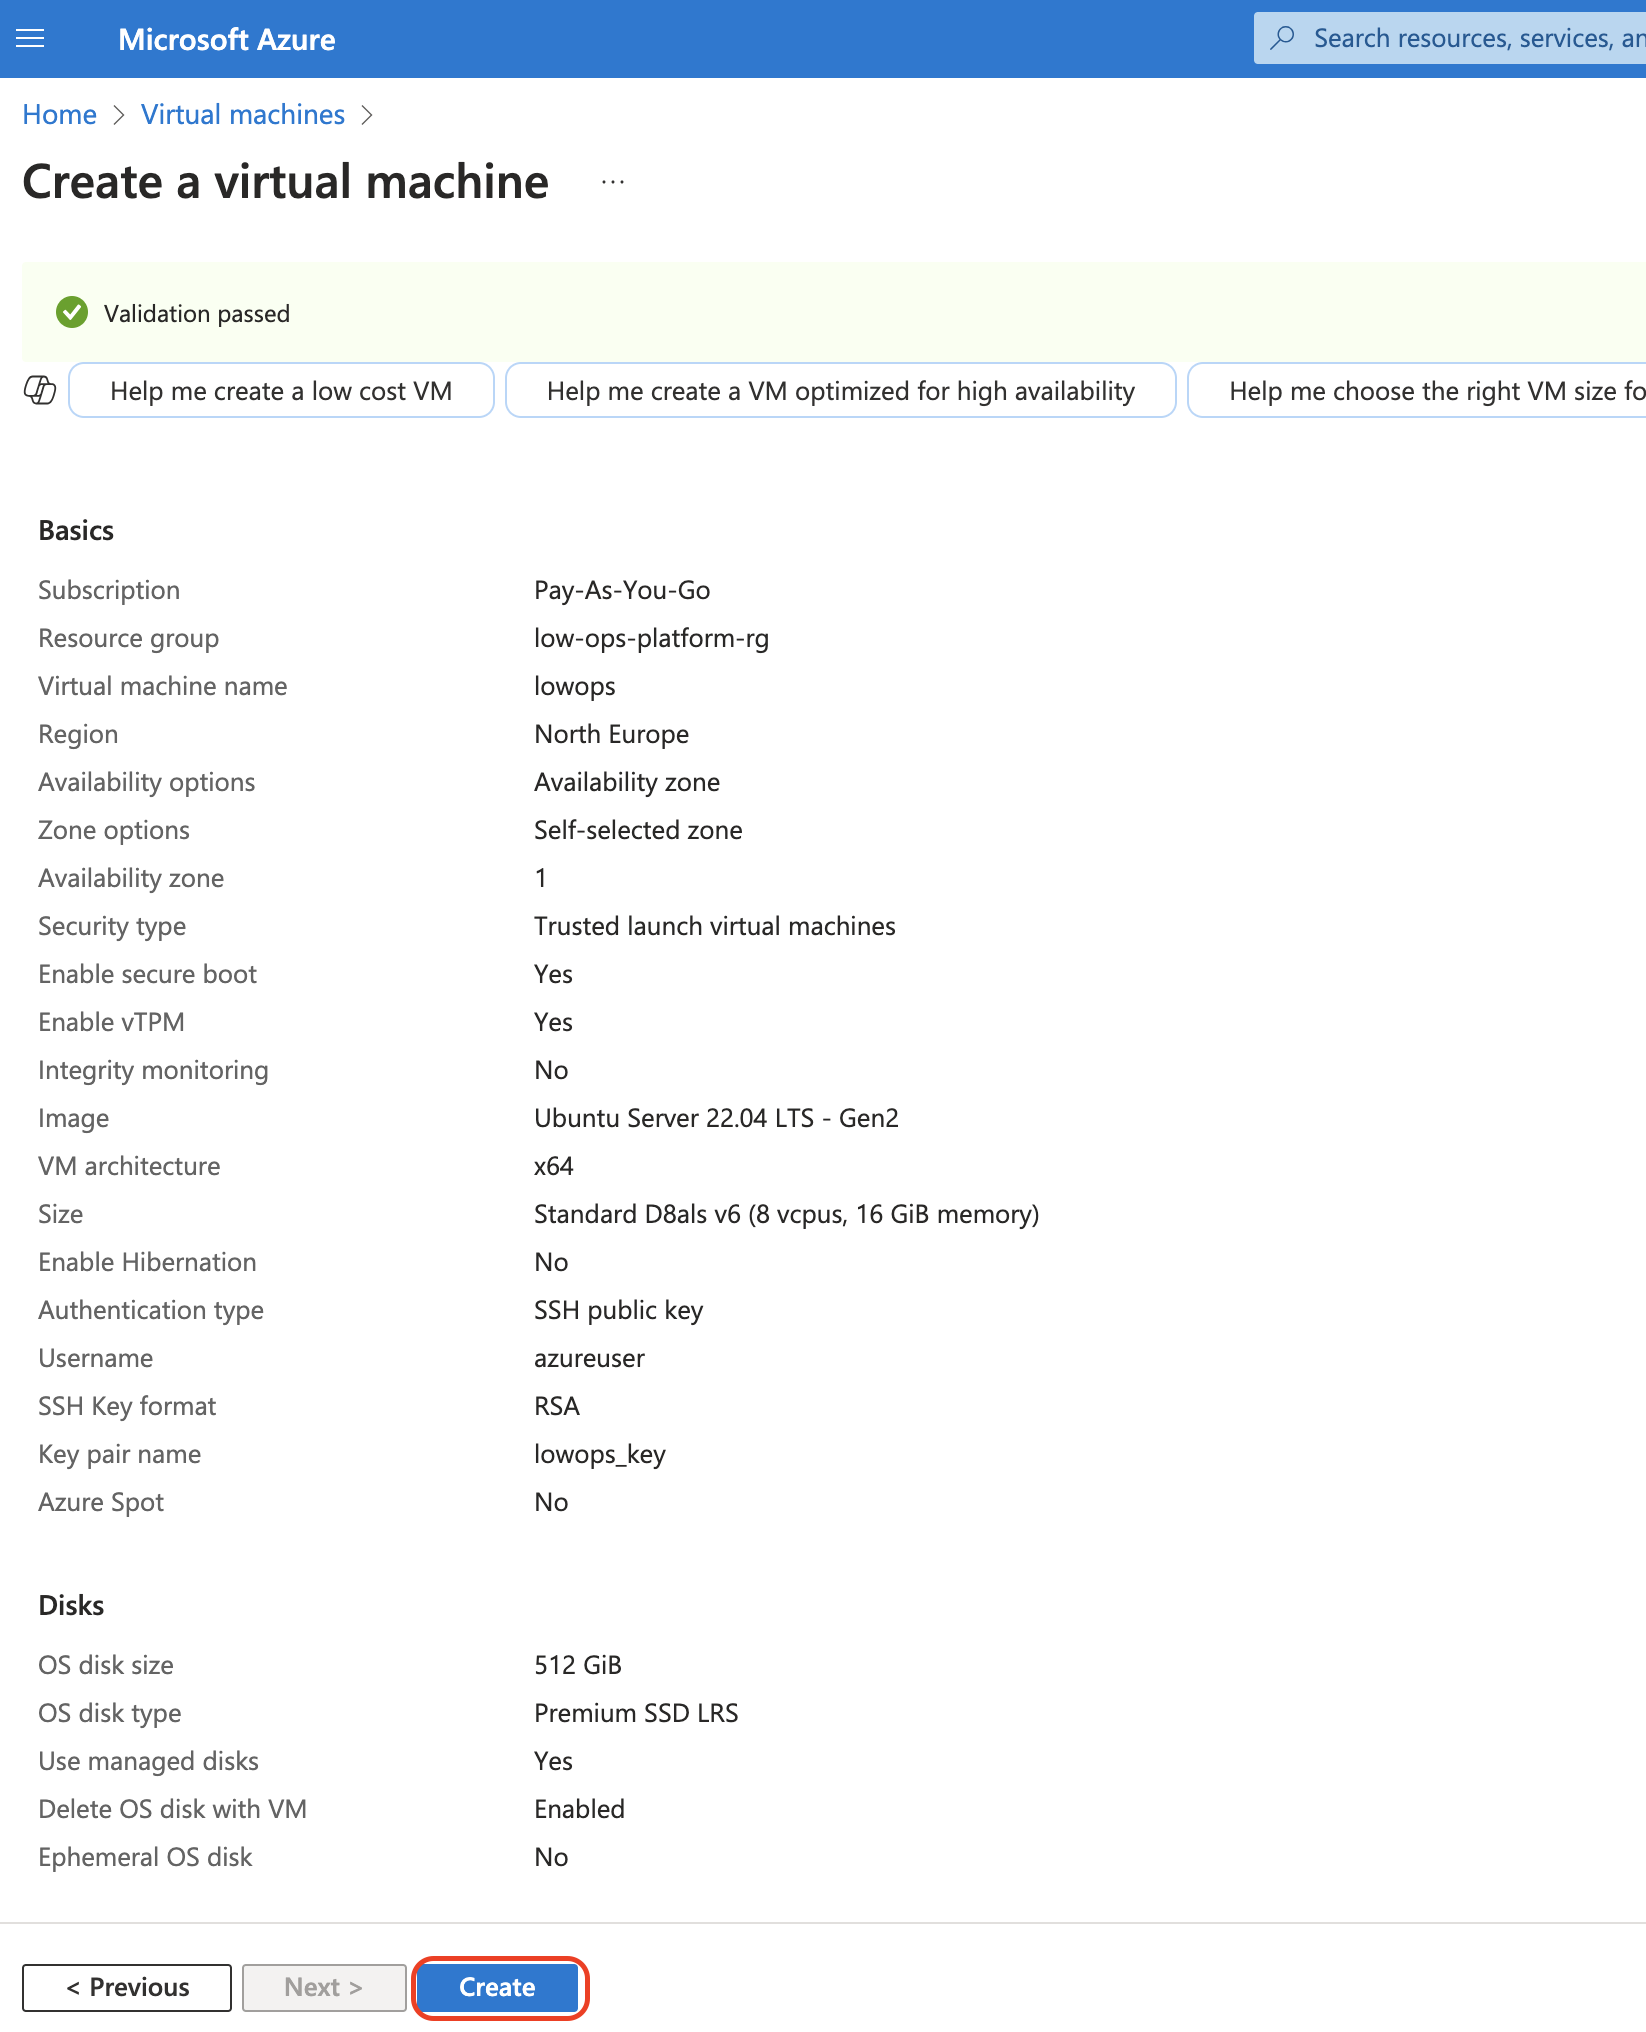
Step 6. Review and Create VM
Review the settings and click Create.
Configure DNS record
Configure wildcard A record pointing to VM public IP address within DNS provider of your choice. Example: If your
domain is paas.company.com, create an A record for \*.paas.company.com pointing to your VM's public IP. Wait for
DNS propagation (can take up to 48 hours, but usually much faster).
Install Low-Ops
Step 1. Connect to your Azure VM
Connect to your VM via SSH.
ssh azureuser@your-vm-public-ip
Step 2. Install Low-Ops
curl -sO https://raw.githubusercontent.com/cinaq/helm-charts/refs/heads/main/charts/lowops-platform/scripts/install-platform.sh
  && chmod +x install-platform.sh
  && ./install-platform.sh
During installation process you will be prompted to input: base domain name (For instance if your portal should be
available at portal.paas.company.com. Base domain is paas.company.com).
Docker registry credentials. Current dockerhub pull image limits requires at list pro plan PAT for successfull installation.
Wait until lowops-platform pod in lowops-devops namespace status is Completed. Usually takes 20-30 minutes.
After installation completes, you can access the platform portal using the credentials from the script output.
Access Low-Ops
Access the Low-Ops at https://portal.paas.company.com